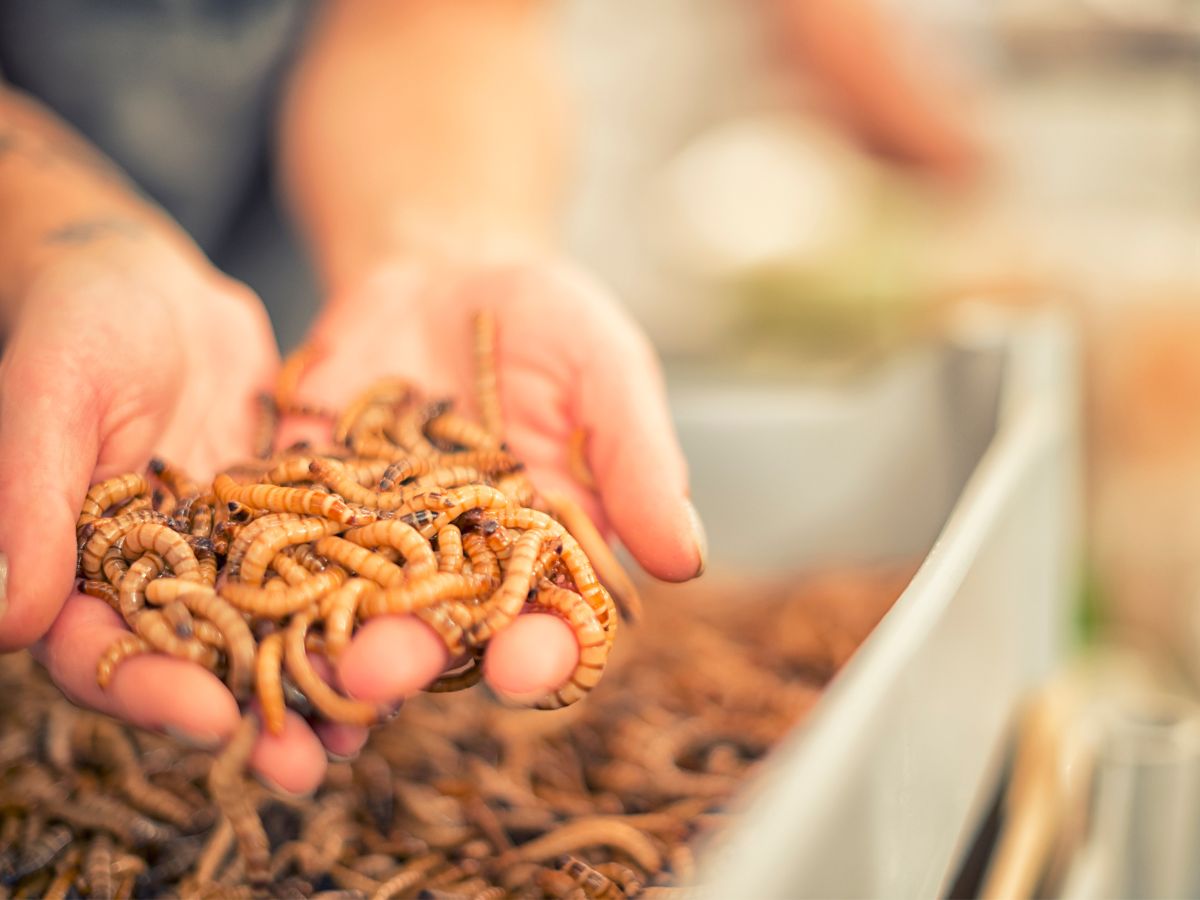
If you keep chickens, you know by now that they are omnivores who relish animal protein from all sorts of bugs and worms. You can supplement their foraging intake by giving them mealworms, but this gets expensive unless you raise your own. How do you raise mealworms for your chickens?
To raise mealworms for your chickens, create a mealworm habitat with a layer of grain-based substrate and bits of potato and apple to act as moisture sources. Add mealworms to form a colony, allowing them to go through their life cycle. Harvest the larvae, leaving enough to keep the cycle going.
The basics of raising mealworms are simple: as long as you provide for their needs in terms of shelter, food, and water, they will grow and multiply. All else you need is an understanding of their life cycle and some patience, and soon you will have raised a lovely load of wriggly, crunchy protein for your chickens.
Contents
For mealworm breeding you will need the following things:
- live mealworms
- 3 boxes or tubs as accommodation
- wheat bran as substrate
- fruits and vegetables as food
- Cat litter box scoop or sieve to separate mealworms, pupae, and bugs from substrate
Mealworms Factsheet:
Latin name: Tenebrio molitor
Mealworms size: 20 to 30 mm long
Flour beetle size: 10 to 18 mm long
Nutritional values of 100g freeze-dried mealworms
| Calories | 539 kcal / 2228 kJ |
| Fat | 35g |
| Carbohydrates | 7g |
| Protein | 45g |
Mealworms are a high quality source of protein with an average of 45 to even 60g of protein per 100g. Especially during molting and growth, chickens have an increased protein requirement and can thus benefit from supplemental feeding of mealworms.
Life cycle of mealworms
| Period | |
| Egg | 4 to 18 days |
| Mealworm | 6 weeks to 9 months (10 to 16 molts) temperature-dependent |
| Pupa | 6 to 20 days |
| Flour beetle | 2 to 3 months |
How To Grow Mealworms For Feeding To Chickens
It’s expensive to keep buying live mealworms, but you will find it easy to raise them yourself.
Their life cycle takes around two months and consists of four stages: eggs, larvae (the feeding stage), pupa, and adult darkling beetles (the breeding stage). You feed the larvae to your chickens as mealworms, meaning you must take out larvae for your chickens while leaving enough to mature into breeding adults to keep the life cycle going.
You can feed your mealworms dog food, grains such as corn, barley, oats, and wheat bran, or poultry mash (one that doesn’t contain diatomaceous earth, as this is fatal to mealworms). In other words, you can feed them foods you will readily have on hand to feed your chickens. Sterilize it before use by spreading it on a baking tray and heating it to 130-150 degrees Fahrenheit for 20 minutes.
1. Create A Habitat For Raising Mealworms
Use a small fish tank as a habitat for your mealworms, or obtain a small plastic storage bin and make holes in the lid to ventilate it. Alternatively, your local pet shop may supply vented containers for raising mealworms.
As long as the container’s sides are smooth and vertical, and the container is at least 5 inches deep so that the mealworms are 3 inches below its rim once you have added the substrate, they will not be able to escape.
You need at least 3 boxes in total:
- One mealworm box
- One box with mealworm pupae
- One box with mealworms
Put a couple of inches of substrate in the bottom of the container. This substrate replicates the natural habitat of mealworm larvae in dark places in leaf litter (and as pests in human grain stores). The larvae will burrow in the substrate (wheat bran, rolled oats, corn meal, chicken mash, or other grains) and feed on it.
Place bits of raw potato and apple in the container. Your mealworms will feed on them and obtain their moisture from them, and the vegetables will help maintain the moisture content of the substrate. To reduce waste, use leftover bits such as potato peelings and apple cores.
Cut some sheets of newspaper to lay on top of the substrate, leaving a little gap between the paper’s edges and the container walls. Many of the worms will wriggle into these sheets of newspaper, making harvesting easier. Once or twice a day, lightly spray the paper with water to moisten it. Do not soak it.

2. Buy The Initial Stock Of Mealworms For Your Colony
Buy a stock of mealworms from your local pet shop or a reputable local source to be a starter colony. You will only need around 500 to 1000, which means this will not be too expensive.
Use a large elastic band to secure a piece of cheesecloth over the container to keep insects such as flies out while letting air in.
Put your mealworm habitat in a warm, dark environment. If your climate is mild, a garden shed will work. Otherwise, you could keep the habitat in a closet if you are not squeamish. Keeping the critters warm helps them grow and mature fast. In winter, you can use a cheap heating pad under the container to keep your mealworms warm. Maintain the colony around 80 degrees Fahrenheit.
The mealworms will molt (shed their exoskeletons) several times. After some three weeks, the larvae pupate. After spending around two weeks or so as pupa, the adult beetles emerge and mate. You will know when this is about to happen because the pupa darkens in color. The females then lay 70 to 100 tiny eggs each.
The adult beetles die, and the eggs grow into larvae – the numbers of mealworms in your colony will have exploded, and you can start feeding mealworms to your chickens.
3. Manage Your Mealworm Colony
Every couple of days, before the pieces of potato and apple dry out or grow moldy or rotten, replace them with fresh bits. Top up the substrate as the mealworms consume it.
Once a month, replace the substrate with fresh material (or sooner if you notice any smell). Sift the eggs, mealworms, pupa, and adult beetles, and discard the substrate. Wash and dry your container, refill it with the substrate, and return your colonists.
Feed supplemental foods to your colony of mealworms to increase their nutritional value. We recommend citrus pieces, chunks of carrots, and leafy greens.
Food for your mealworms:
- Fruit
- Vegetables
- Grains like corn, barley, oats
- Wheat bran
- Bread
As soon as you find the first pupae in the mealworm box, sort them into your second box (pupa box) using the litter box scoop. Here, after 2 to 3 weeks, the beetles will hatch, which you again sort out and put into your third box, the beetle box.
From the eggs that the beetles lay in the substrate, small mealworms will hatch, you can either sort them back into your mealworm box, or you can leave them in the beetle box, as the beetles usually die after a few months.
Once the little mealworms are big enough, you can feed some of them to your chickens.

4. Store The Mealworms
Mealworm life cycles slow down at lower temperatures. You can send your mealworms into stasis for months at a time and store them long-term in the refrigerator. Place them in the fridge in plastic containers with a 1-inch layer of substrate, without any fruit or vegetable bits. Ensure that the lid lets air through.
Label the container (include the date) and put it in the corner of the refrigerator where it will not freeze. Do not put mealworms in the freezer unless you wish to kill them.
5. Prepare Mealworms To Feed To Chickens
You can remove mealworms from the newspaper layers or scoop them out with the substrate. Sift out the substrate and any eggs, leaving you with mealworms to feed your chickens. These are around 30 percent protein; you can provide them twice a week to make up no more than 10 percent of your chickens’ diet.
When working with mealworms, wear gloves. Some people become allergic to the fine dust created by these critters – if you already have breathing issues, we recommend wearing a mask when working with them.
The 3 biggest mistakes in a mealworm breeding
1. Mold growth
If there is too much moisture in your mealworm boxes and they are poorly ventilated, mold can develop. Be sure to change out the food regularly and place your boxes in a dry, warm, well-ventilated area.
2. Mealworms grow too slowly
This is usually not due to a lack of food, but to the temperature being too low. Mealworms are most comfortable at around 78 °F (26°C) and develop well. If you can’t raise the room temperature, you can help with a heating mat.
3. Parasite infestation
Parasite infestations in a mealworm brood are usually food mites. Grain mites are small, 0.2 and 1 mm long whitish milled mites that feed on food scraps, as well as bran and oatmeal. If your mealworm boxes are infested with Grain mites, you can get rid of them by keeping the substrate as dry as possible and by increasing the temperature to about 80 to 86 °F (27 to 30 °C).
Conclusion
So that’s how you raise mealworms cheaply and efficiently to provide your chickens a plentiful source of healthy protein. It is not too much of a hassle to keep your mealworm farm running, and it is fascinating to boot. The cost-saving and convenience are well worthwhile.
Frequently asked questions
Can mealworms fly? Can mealworms be kept in an open box without a lid?
Mealworms can theoretically fly, but they rarely do. Of course, you don’t need a lid on the box with your mealworms, and you can usually do without a lid on the box with your adult mealworms.
How long does the development from mealworm to flour beetle take?
The development from egg to adult flour beetle takes about 4 to 5 months, at temperatures between 75 to 80 °F (24 and 27 °C). Since their growth is temperature dependent, it can take much longer (up to a year) at lower temperatures.
Female mealybugs lay around 200 to 400 eggs in a clutch, from which small mealybug larvae hatch. They pupate 10 to 15 times over a period of 3 to 6 weeks until they pupate and hatch as flour beetles.
Adult mealworms live for about 6 months.
Mealworms are fairly hardy animals and can survive up to nine months without food.
What temperatures are ideal for mealworms?
Mealworms feel most comfortable at a room temperature of 68 to 73 °F (20 to 23 °C). It can also be warmer up to 80 °F (27 °C), but in no case hotter than 107 °F (42 °C) for several hours, at these temperatures they die.
Also, your mealworms should not get colder than 50 °F (10 °C), as they will not develop at these temperatures.
How long do dried mealworms keep?
Dried mealworms will easily keep for several months.
Is the mealworm a worm?
Actually, mealworms are not worms, but the larvae of the flour beetle (Tenebrio molitor).
How often does a mealworm shed its skin?
A mealworm sheds its skin 10-16 times from hatching until it pupates. The larval stage lasts about 20 days.
Do mealworms need water?
Mealworms do not need an extra water dish, they draw the moisture they need from their food, for example vegetables such as cucumbers.
How often do I need to feed the mealworms?
For your mealworms to develop well, they need fresh food regularly. Usually it is enough to change the food every week. If you notice that pieces of fruits and vegetables go bad earlier, you need to change them sooner.
Suitable food for mealworms includes oatmeal, wheat bran, vegetables and fruit.
How long does it take for mealworms to multiply?
The development of mealworms can vary depending on conditions, such as temperature. In optimal conditions, such as a constant temperature of about 77 °F (25 °C) and an adequate supply of food, it can take about 2 to 3 months for mealworms to reproduce.
However, they can also survive in less favorable conditions, in which case their growth is significantly slowed down.
How can I protect mealworm breeding from mold and bacteria?
Mealworms require a clean and dry environment to remain healthy.
The substrate should be changed regularly and it should not become too moist. Adequate ventilation also helps to prevent mold from forming.


