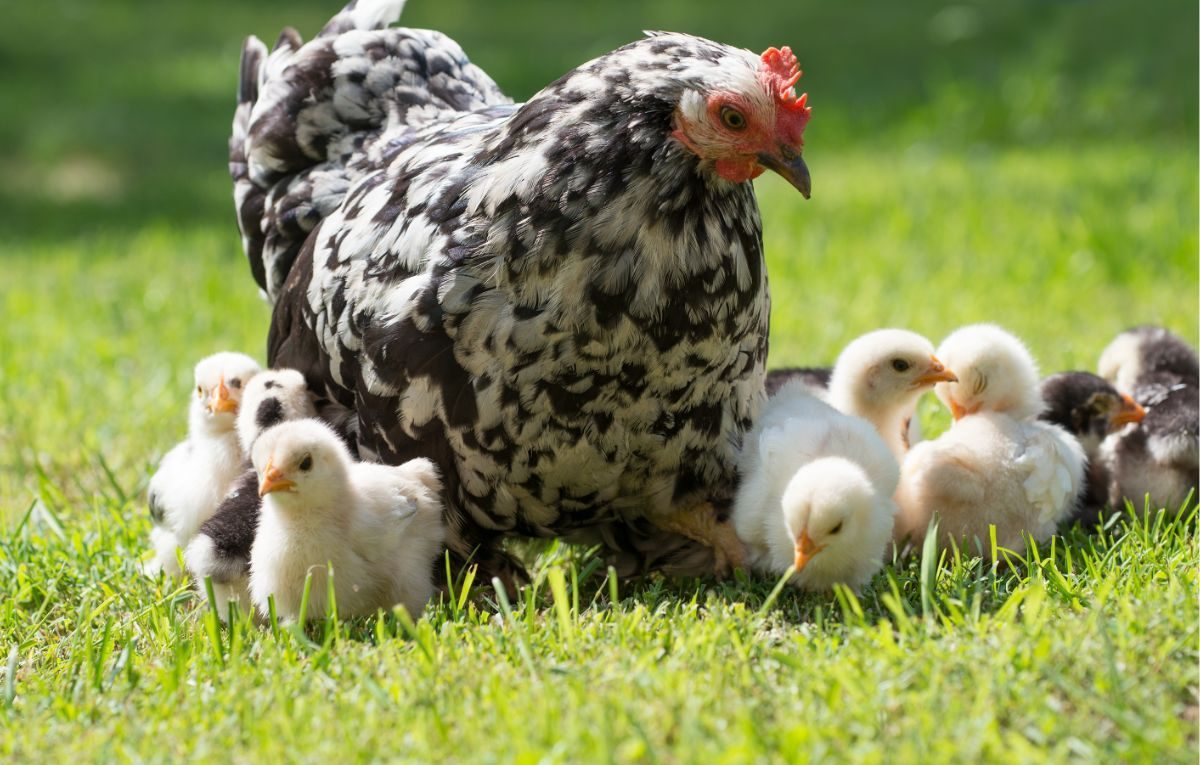
The best, low-fuss way to continuously refresh a backyard flock is to let nature take its course and allow hens to hatch eggs. This method also saves a lot of headaches for chicken owners, as the mom hens will do all the incubating and babysitting for you. There are few things cuter than watching a clucking, fluffed-up mother hen leading her tiny brood around the yard.
If you have a broody hen and are new to the natural egg incubation process, read on. We have listed nine easy steps to guide you through the process, and you may soon be welcoming your first batch of adorable chicks.
How to hatch eggs with a broody hen:
- Ensure eggs are fertile
- Provide 10-14 eggs
- Mark the eggs
- Ensure the brooding box is satisfactory
- Provide food and water for the hen
- Wait 21 days
- Create a safe floor-level transition cage
- Provide starter feed
- Chick-proof the environment
Contents
1. Ensure The Eggs Are Fertile
Unless you have a mature rooster in your flock, your chicken eggs are not fertile. Allowing your hen to brood infertile eggs is a waste of time for you, and the hen will lose a lot of weight for a guaranteed zero hatch rate.
Even if you have a rooster, getting fertile eggs from another source can be a good idea. That way, you will be ensuring that there is no inbreeding. However, if you have a rooster and want to hatch from your own flock, all the eggs in your coop should be fertile, and you can use eggs collected from other hens.
2. Mark The Eggs With The Date
Use a pencil or wax crayon to date the eggs. It can also help to put an X or other mark on the flip side of the date. It makes it easier to spot those eggs in a glance while dodging grumpy-hen pecks each time you go into the coop.
You do not need to mark the eggs if your hen is in a separate area away from the other chickens. However, if its nest is in an open coop, it is not unknown for another hen to lay its eggs next to your broody hen each day. When new eggs get mixed up with eggs already in the incubation process, the result is always horrible.
If they are not marked, you won’t know which are the new eggs in the nest and may end up removing an egg that is partially incubated. If you leave the fresh eggs, the first lot will hatch before the newly added eggs. Unless you own an incubator, you will eventually have to discard partially incubated eggs which is very upsetting.
3. Ensure That The Brooding Box Is Ideal
To ensure a healthy and successful hatch, ensure the hen is perfectly comfortable. The eggs will also do better on a soft nest of clean nesting material like chopped hay or straw.
Without disturbing your angry bird too much, push some additional nesting material into the box around her. She will be able to create a little hollow to keep the eggs neatly under her warm body throughout the brooding period.
If you are putting the hen into a separate brooding cage, she must have enough space to get off the eggs at least once a day to poop, eat and drink. If a hen has access to outside, don’t be too worried if you see her also having an occasional quick dust bath. Hens instinctively know how long they can be away and rush back pretty quickly when they have refreshed.
4. Put The Eggs Under the Broody Hen
The recommended number of eggs is between 10 and 14. There is no guarantee that they are all viable, so starting with as many as the hen can keep warm is better.
After 7 or 8 days of your hen sitting the eggs, you can candle them. This is to check for signs of development so that you can discard any infertile eggs.
5. Provide The Broody Hen With Food And Water
When a hen is broody, it neglects its own care, and there is often a significant loss of weight and condition. This is to be expected, but there are a few things you can do to keep it as healthy as possible.
A conveniently situated bowl of food and water will make things much easier for your brooding hen. Adding a few treats and some chopped fresh greens to the food offering also helps to keep them in good shape. Three weeks is a long time to be hungry if there isn’t food nearby.
Ensure that the food and water bowls are kept spotlessly clean and are not so close to the nest that they could tip and ruin the eggs. Remove food at night to avoid pests like rodents bothering her.
6. Wait For 21 Days For The Eggs To Hatch
You have 3 weeks from when you provided your hen with fertile eggs to the date they are likely to hatch. Use this time to get a bag of chick starter feed for your new little peeps.
On day 21, the chicks start tapping away at the inside of their shells. Hatching is a slow process. Do not be tempted to ‘help’ or speed things up by opening any shells. Even if the chick’s face is visible, the hatching and drying process may take several hours, and it needs to happen slowly.
What you can do is remove empty shells as you see them. The danger with leaving them in the nest is that unhatched eggs occasionally slip inside an empty shell, trapping the unhatched chick inside a double layer.
Don’t be in a rush to move the hen and her chicks after they have hatched. As long as there is food and water within neck stretch length, she will continue to sit on any unhatched eggs for another few days. Any eggs that haven’t hatched after 25 days should be discarded.

7. Create A Safe Transition Area For Hen And Chicks
If your hen is already in a brooding cage on the ground, it won’t be difficult to open the door when the chicks are strong enough to run behind their mother. However, if your hen has brooded in a raised nesting box in the coop, you will need to create a protected space at ground level after the chicks arrive.
When the chicks are tiny, they are highly vulnerable, so the mother hen instinctively tries to shelter them. A good transition area should contain a comfortable nesting box where the chicks can get in and out of themselves and have space to move around.
Try to provide a similar environment in the cozy ground nest as the spot where the hen is brooding. The nest box should only be open on one side so the hen feels safe inside.
A large cage situated on the floor of the coop works well. Ensure the wire mesh is fine enough so chicks can’t slip through. Once the tiny chicks are a few days old, you can open the cage door, and the hen will lead the chicks out when she feels ready.
Owners must be careful when moving the little family into the transition box or if you want to pet a cute chick. Even hens that are usually docile may instinctively fly up and uncharacteristically attack anyone who approaches the chicks. This is natural behavior, but be cautious, especially if accompanied by children.
8. Provide Starter Feed For Chicks
Newly hatched chicks don’t need to eat or drink for 2 or 3 days after hatching. They can survive off the nutrients in what’s left of their egg yolk sack. That is why you can buy day-old chicks that have been transported great distances.
You, therefore, don’t need to be in a rush to feed the first chicks to emerge if you still have to wait a day or two longer for a few more to hatch. However, it doesn’t do any harm to place a flat lid of starter feed near the hen, as the little ones often explore close to her, and they are super cute to watch!
A shallow upturned lid of water near the hen is an inexpensive space saver if your hen still needs to sit for a day or two longer. She will be reluctant to move away from her fragile chicks to eat or drink, so placing food and water in chick-safe little containers close to her is better.
9. Chick-Proof The Coop and Yard
Within a few days, your chicks will be eagerly following their proud (still grumpy) mother hen around the coop and then the yard. Like any children, there are dangers that you need to be aware of to ensure that your chicks survive.
If your hen is free range, ensure there are no drowning hazards, like dog water bowls or buckets the chicks could fall into. They are pretty athletic for such tiny creatures, but steep sides and water are a deadly combination.
Unless there are problems with overcrowding or other stressors, other chickens in the coop usually accept new chicks. They don’t want to end up on the wrong side of an angry mom hen any more than you do!
A final hazard to be aware of is predators. Chicks are easy targets, and it can be heartbreaking to lose them. Keeping the hen and its chicks closed up at night is particularly important as rats make a quick meal of a tiny chick.
Conclusion
Letting your hen hatch eggs naturally is a fascinating and rewarding experience for any poultry owner. Most hens instinctively know how to brood chicks, so all you need to do is keep her happy and comfortable, and get ready to welcome the new generation.


